Categories
Build Research Rudder

First round of deburring

Spent some time earlier this week night reviewing all the parts and I started the deburring process. The tools I used was a drill bit (1/4″) and some 400 grit sandpaper.

The process was pretty straight-forward. Quick sanding of all edge burrs using the sandpaper, and use the drill bit to gently deburr all the holes.

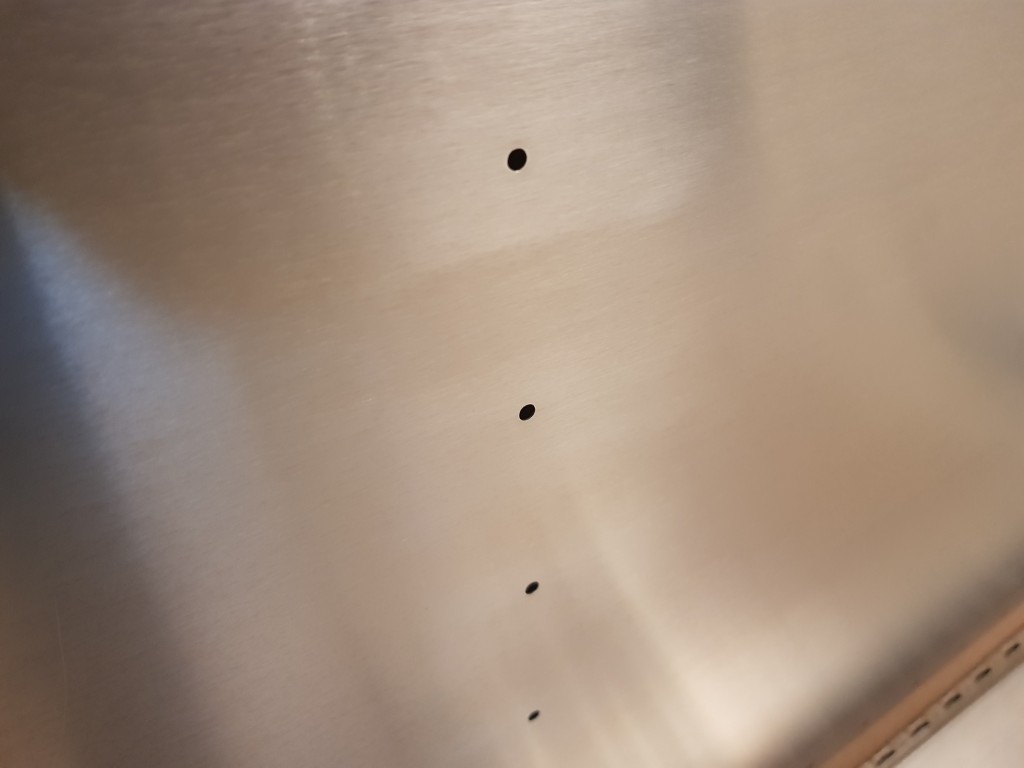
While ribs and spars were easy, I found that dealing with the rudder skin caused some complications. It seems to be fairly easy to countersink, and I really wanted to avoid that. So I opted for turning the drill bit lightly to remove the worst burrs, and then lightly sand the skin surface flat around the hole.

While this made for some good results from a deburring perspective, it caused some really ugly-looking scuffing on the skin. As the aluminum used is not of the clad type, I don’t think this would cause any issues, but it looks horrible in my eyes and I regret this approach. However, I don’t think that using a file would have produced much better results.

Scuff marks around the holes

I decided to go online and look for answers. It would seem that there are as many opinions as there are builders out there. The most common answer was to use a deburring tool and a flat file or a red Scotch brite (ordered). If I want to get rid of the scuff marks, lightly sand and polish.

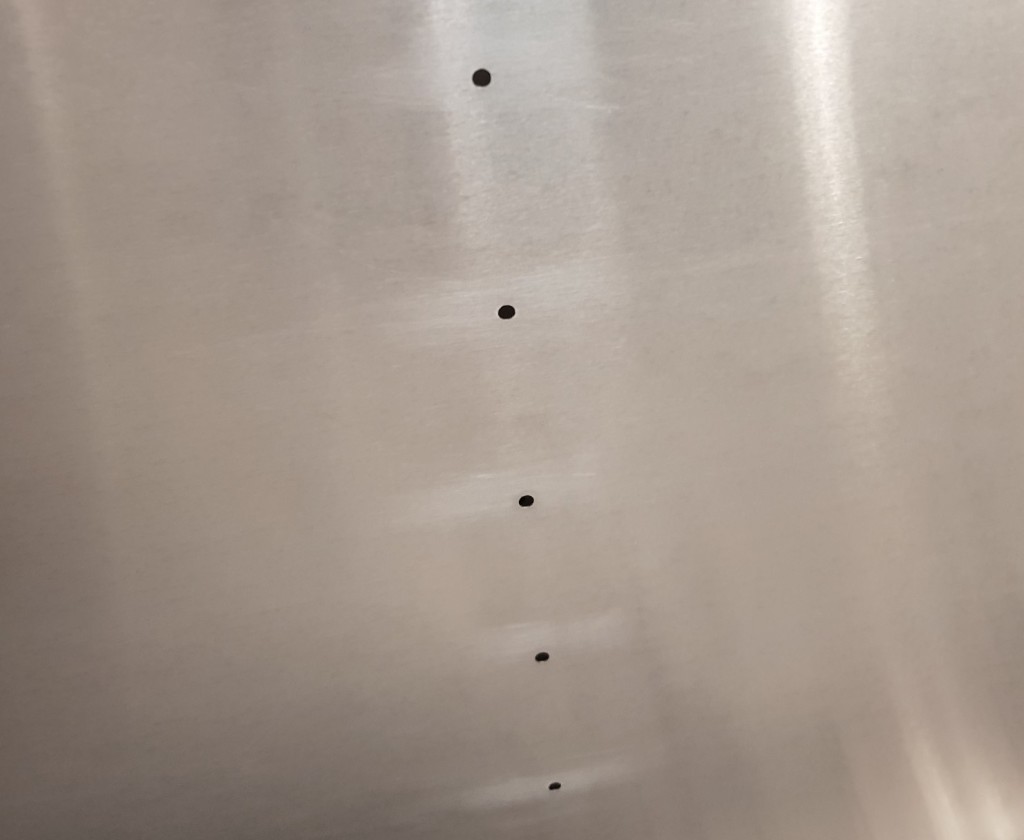
I spent some time last night with a 600 grit and 1500 grit sanding block, and I would say that the surface has improved somewhat. But it will probably never look as pristine again. Lesson learnt!

After attempting to reduce the scuffing
Categories
Deliveries Rudder

Finally, the rudder kit arrived!

As you might recall, I was expecting the kit to arrive last week. But because of the current COVID-19 situation, a lot of the deliveries are delayed. It took almost 10 days for the kit to arrive, but it is finally here.

Door bell rang, and this is what I found on the porch!

Unfortunately, I do have a day job, so I couldn’t really open the create right away. I took a quick look at it and it looked undamaged, so I took it inside and continued working.

After dinner, it was unboxing time.

First, I must give Zenair credit for the extremely well-packed crate. What isn’t visible in the picture is the extreme amounts of packing paper that kept everything from shifting around. The kit is fairly straightforward: a handful of pre-drilled parts, the skin, the plastic shaper and the necessary rivets. Comes with a photo assembly guide and the drawing for the rudder too.

As you can see, I decided to get the hand riveter. The main reason was the custom machine heads. The rest of the tools I can buy or borrow elsewhere, but I didn’t want to make a mistake with the rivets. According to Zenair, there is also the option of sending them your rivet heads and they will machine them appropriately so that you get the right kind of dome.

The evening continued with the mandatory inventory check to ensure that all the parts in the manifest were included in the shipment. So far, all good!

Categories
Uncategorized

Rudder is on its way

After some minor confusion, payment has been sorted with Zenair and the package is finally on its way. Hoping to see it tomorrow!

Categories
Uncategorized

First build day

Today was the first build day at the EAA. After last week’s cleaning of the hangar, we were setup for some building. We watched a relevant section of the Homebuilt Help videos (a set of videos I am definitely going to get) before starting on the wing struts.